Company Setup & Onboarding
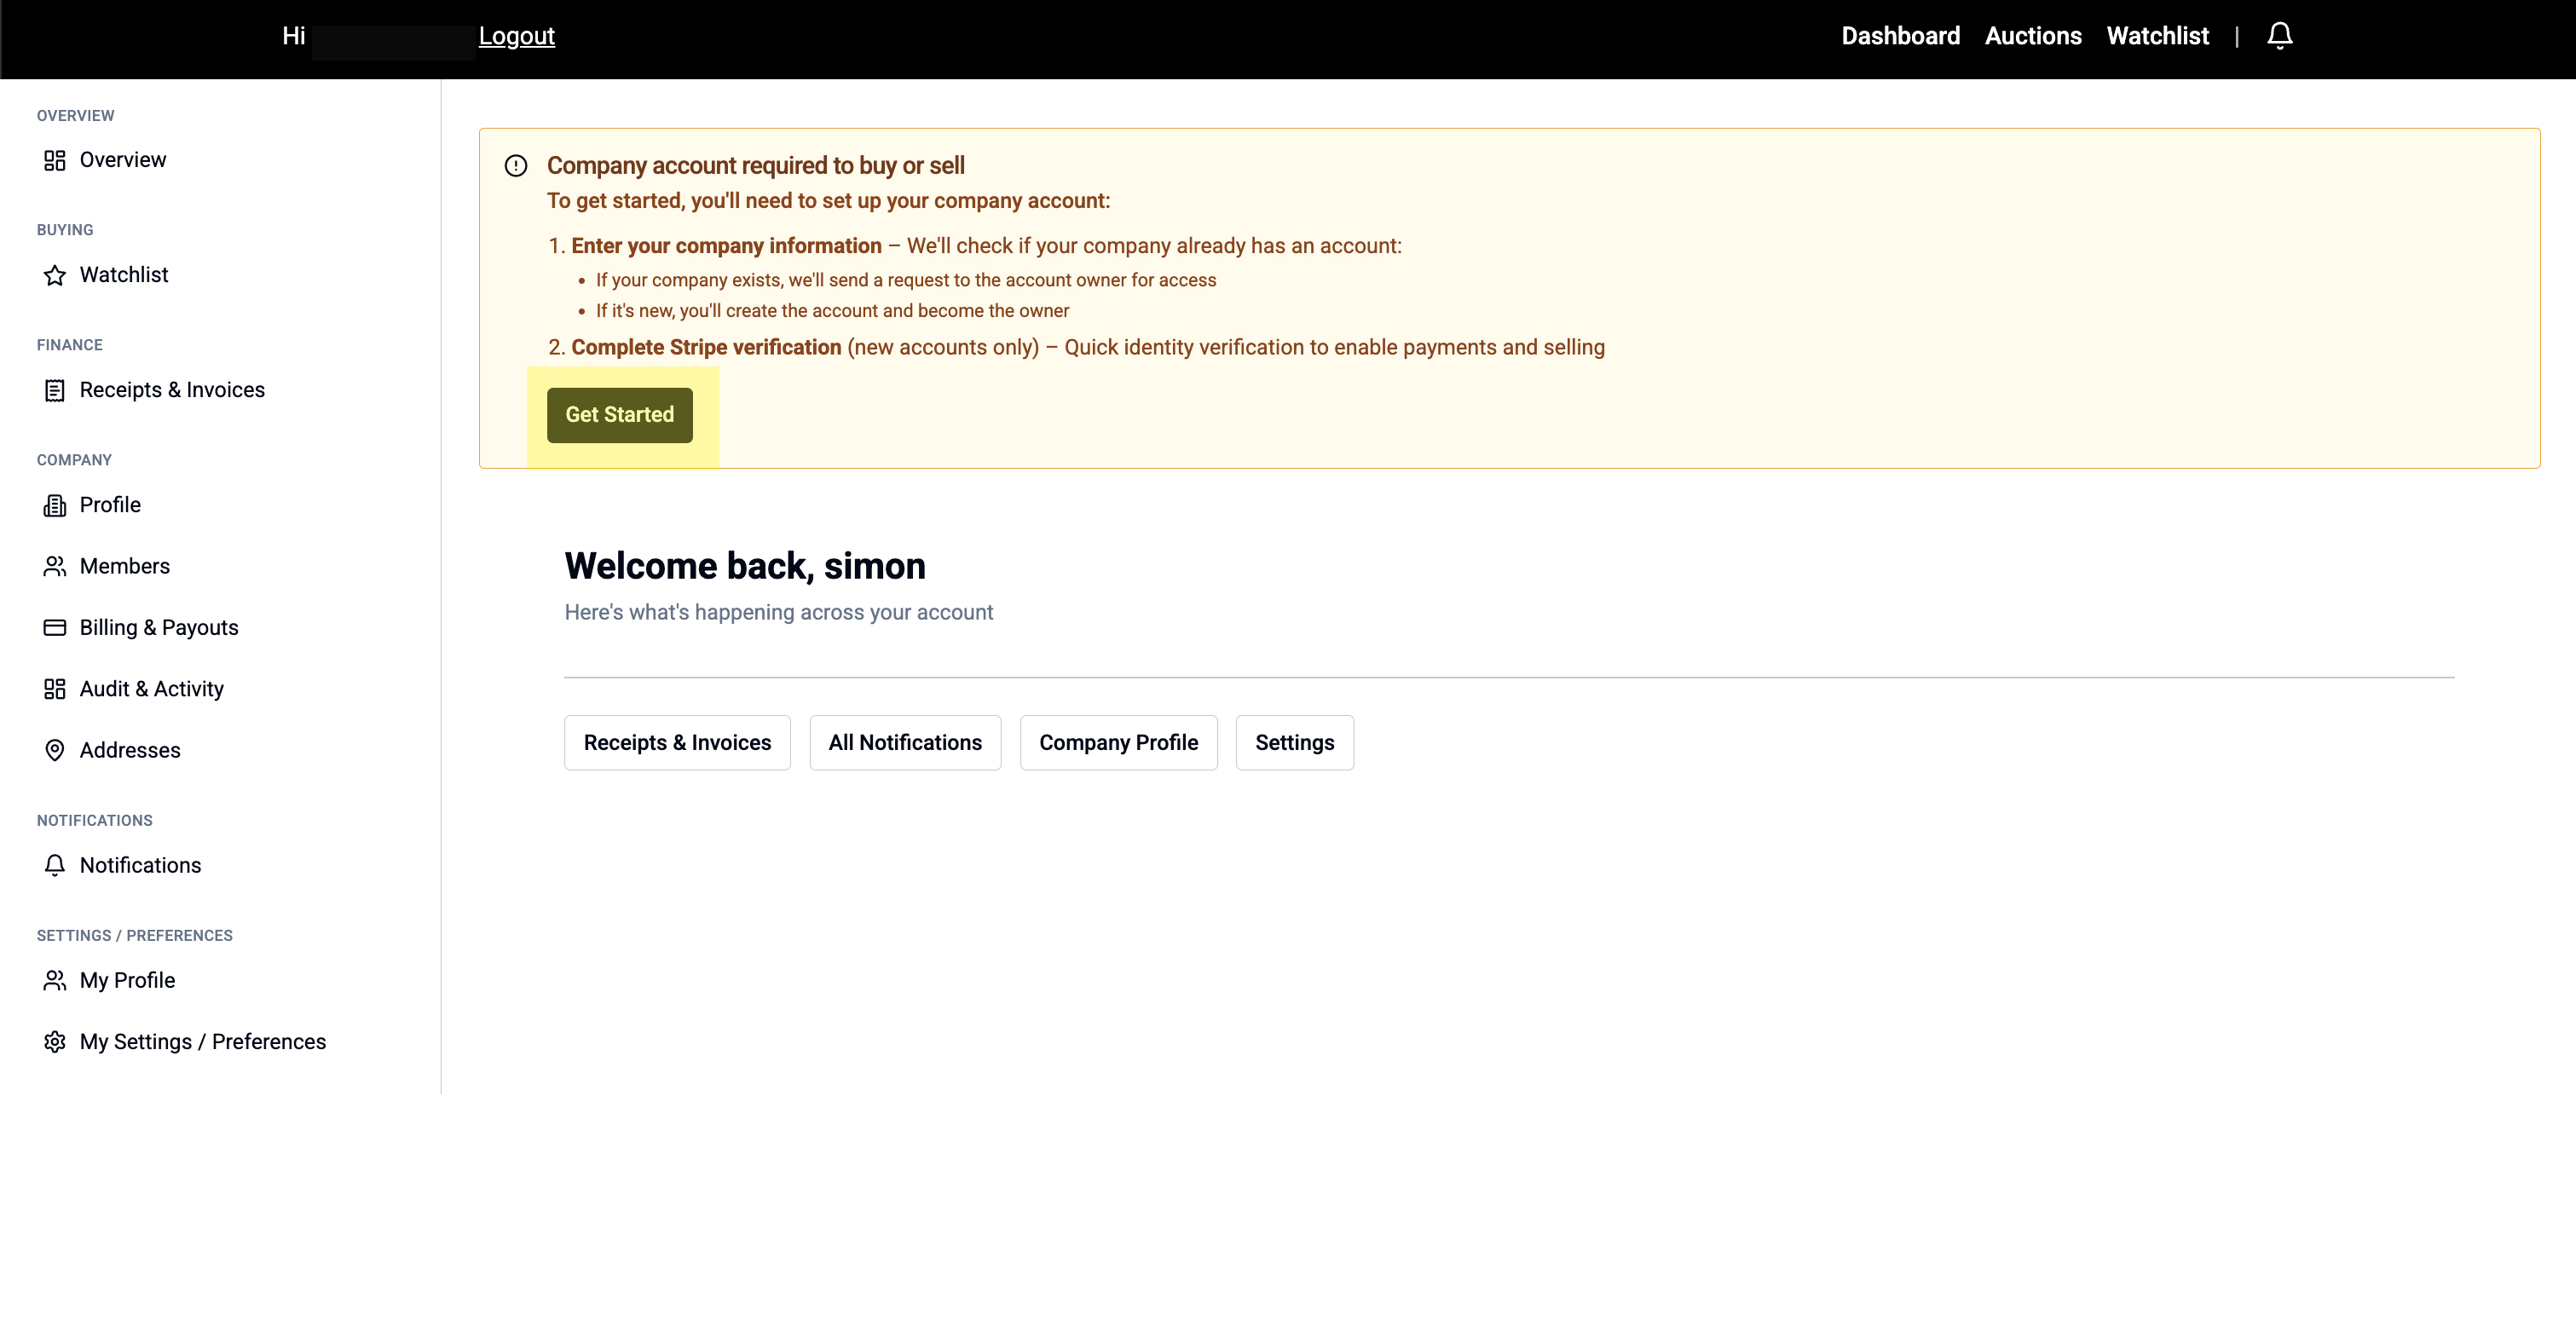
Before you can buy or sell on Meditech Auction, you need to complete your company setup. This includes adding your business details, connecting to Stripe for payments, and adding addresses.
Step 1: Open Company Setup
- After logging in, you'll see a "Get Started" box on your Dashboard
- Click "Get Started" to begin the setup process
Step 2: Enter Company Details
Fill in your business information:
- Company name
- Company registration number
- VAT number
- Contact phone number
- Registered address
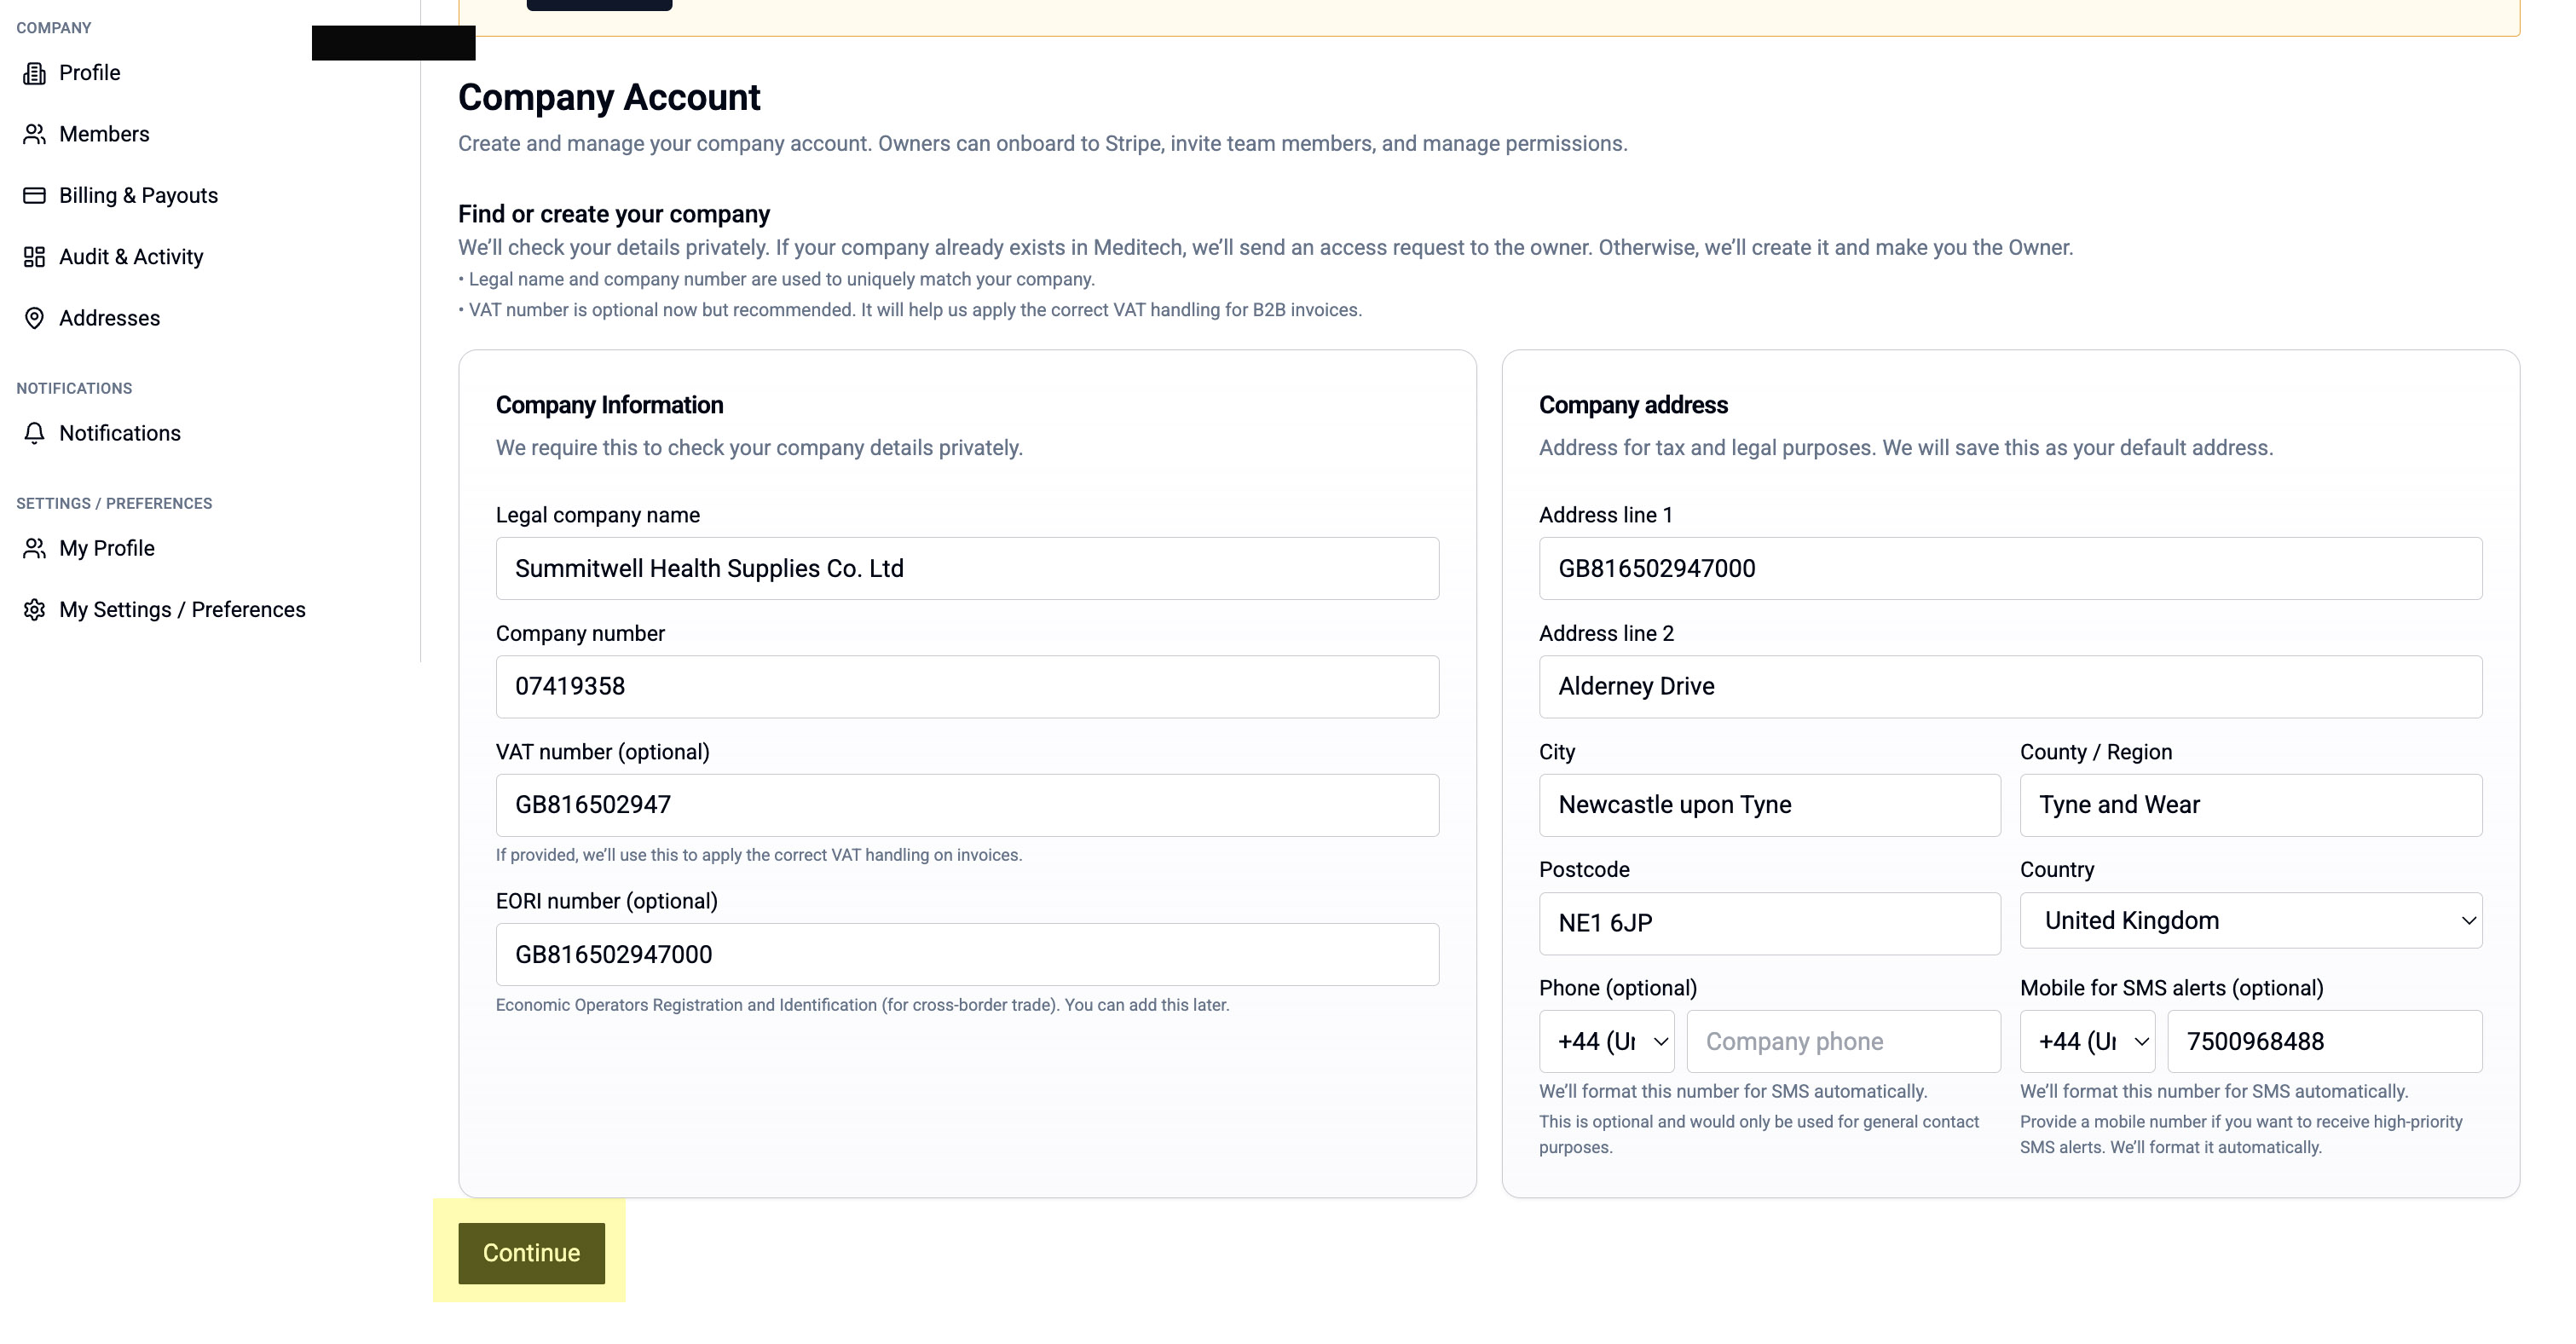
Click "Continue" when finished.
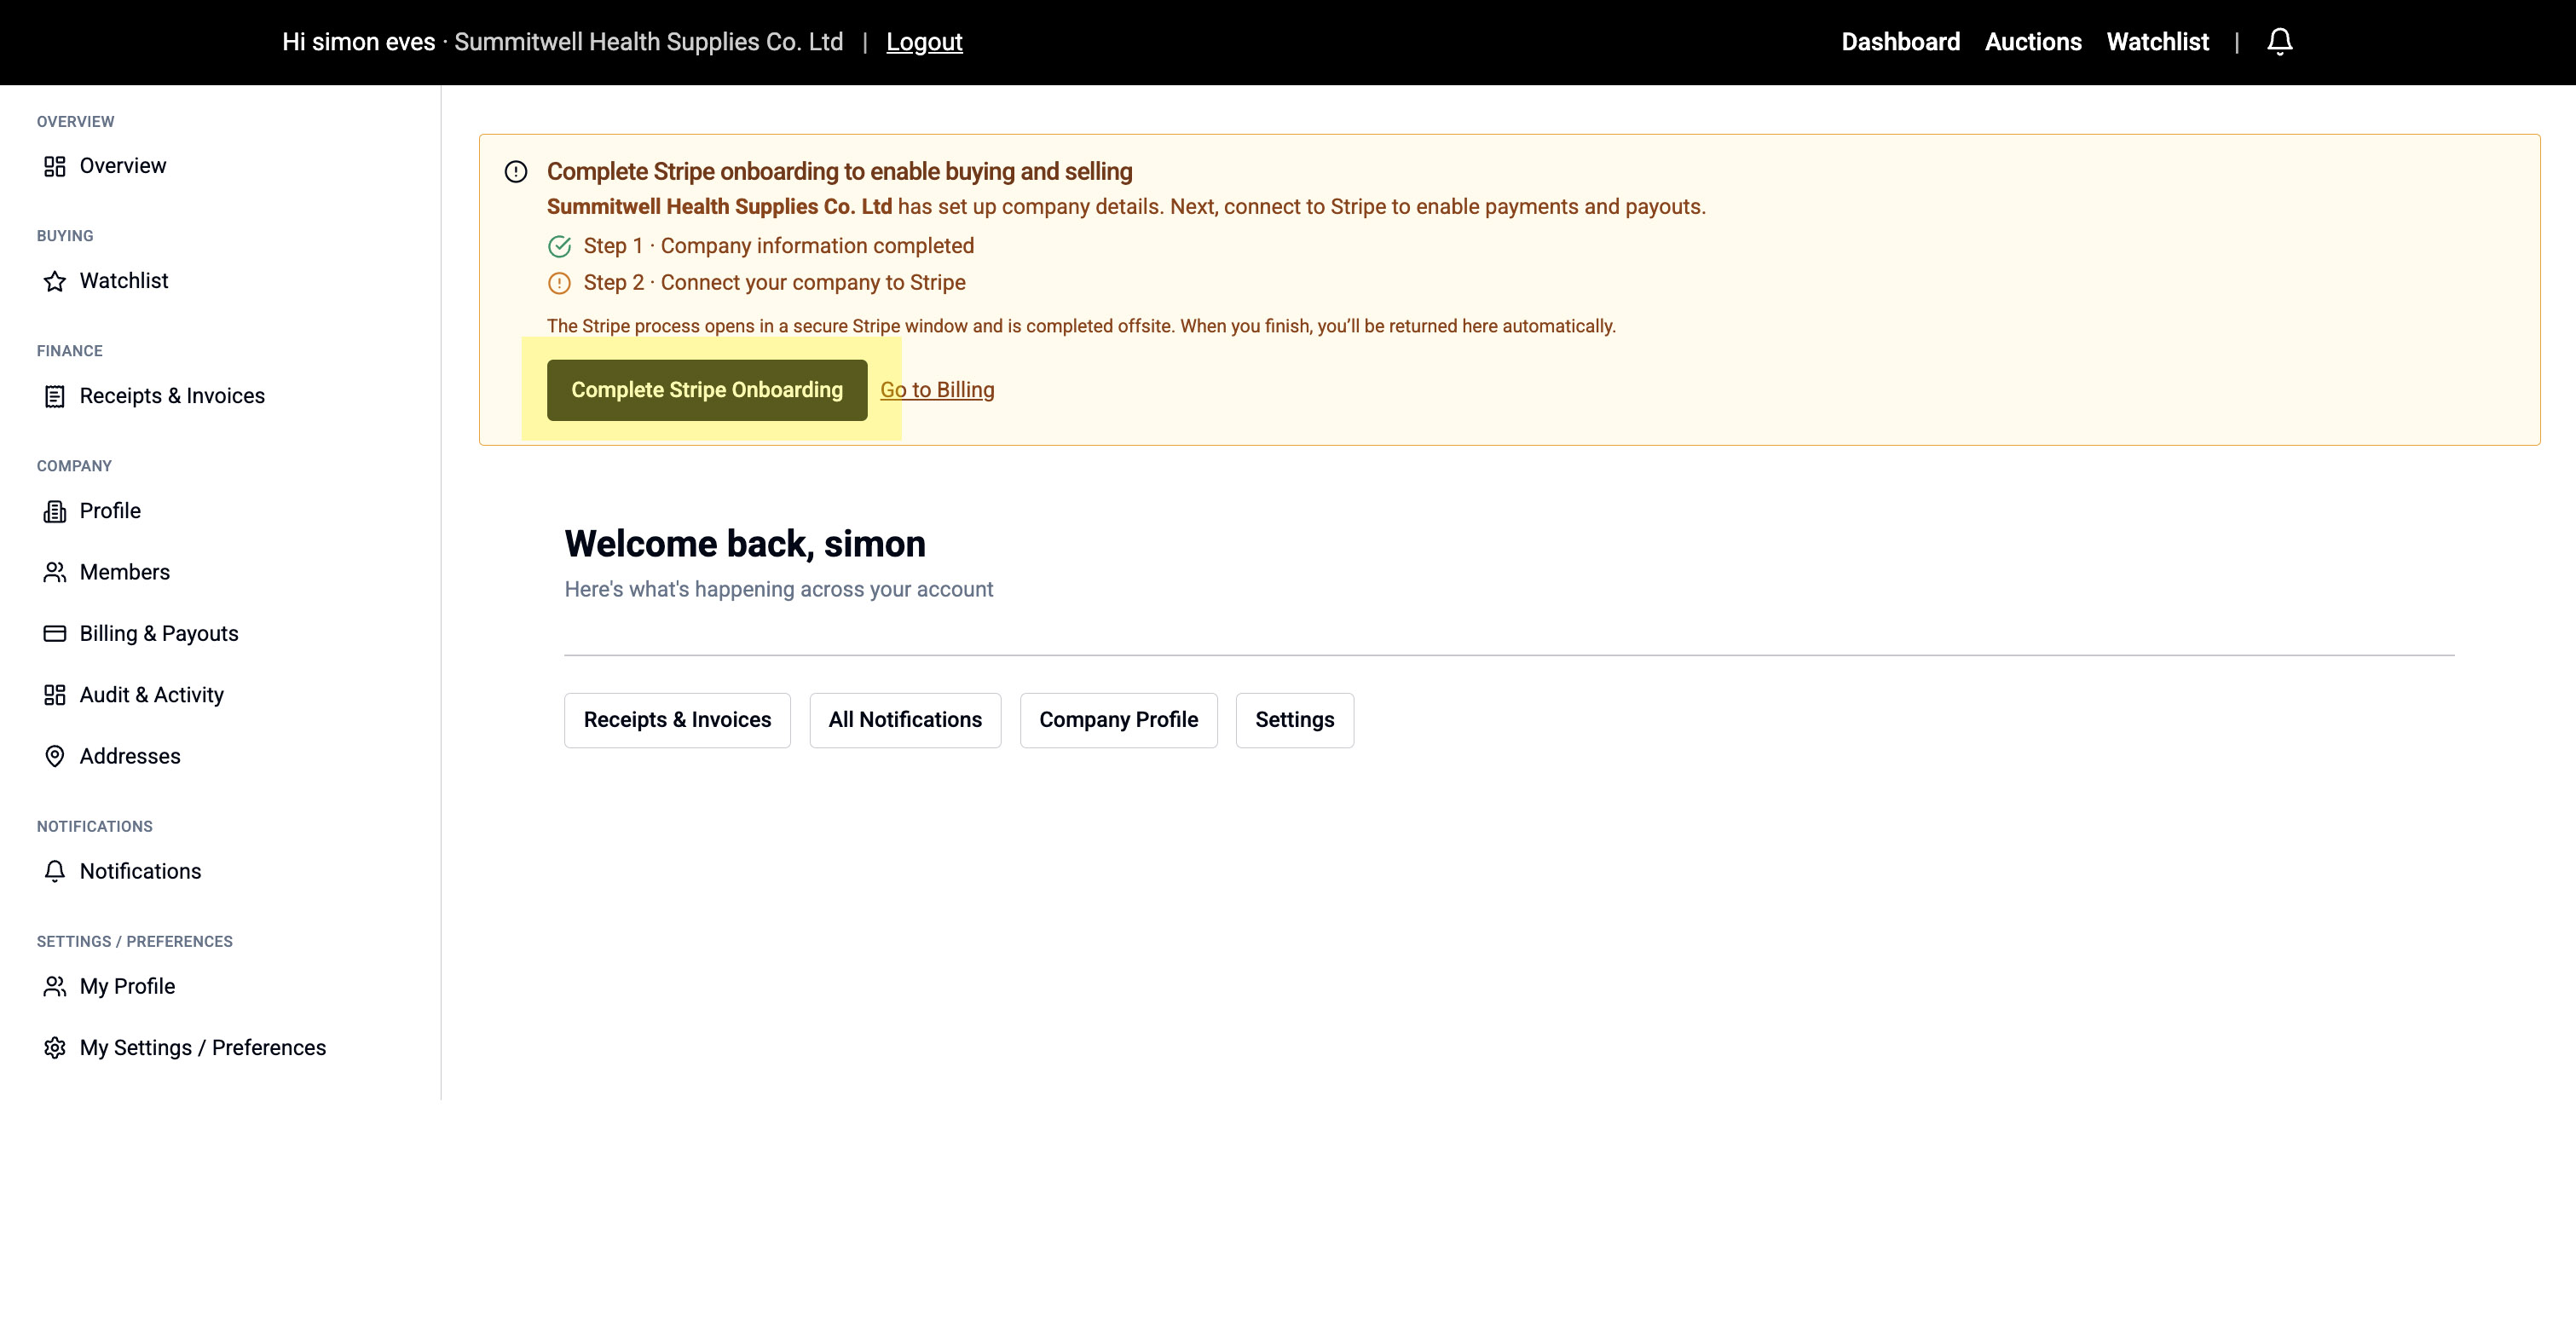
Step 3: Connect Your Stripe Account
Meditech Auction uses Stripe to handle secure payments and payouts.
- On your Dashboard, look for the yellow box: "Complete Stripe onboarding to enable buying and selling"
- Click "Complete Stripe Onboarding"
- You'll be taken to Stripe in a new window
- Follow Stripe's on-screen instructions to verify your business
Step 4: Confirm Stripe is Connected
After completing Stripe onboarding:
- You'll return to the "Billing & Payouts" page
- Check the "Onboarding checklist" and "Account status" panels
- All items should show green ticks or "Approved/Enabled/Verified"
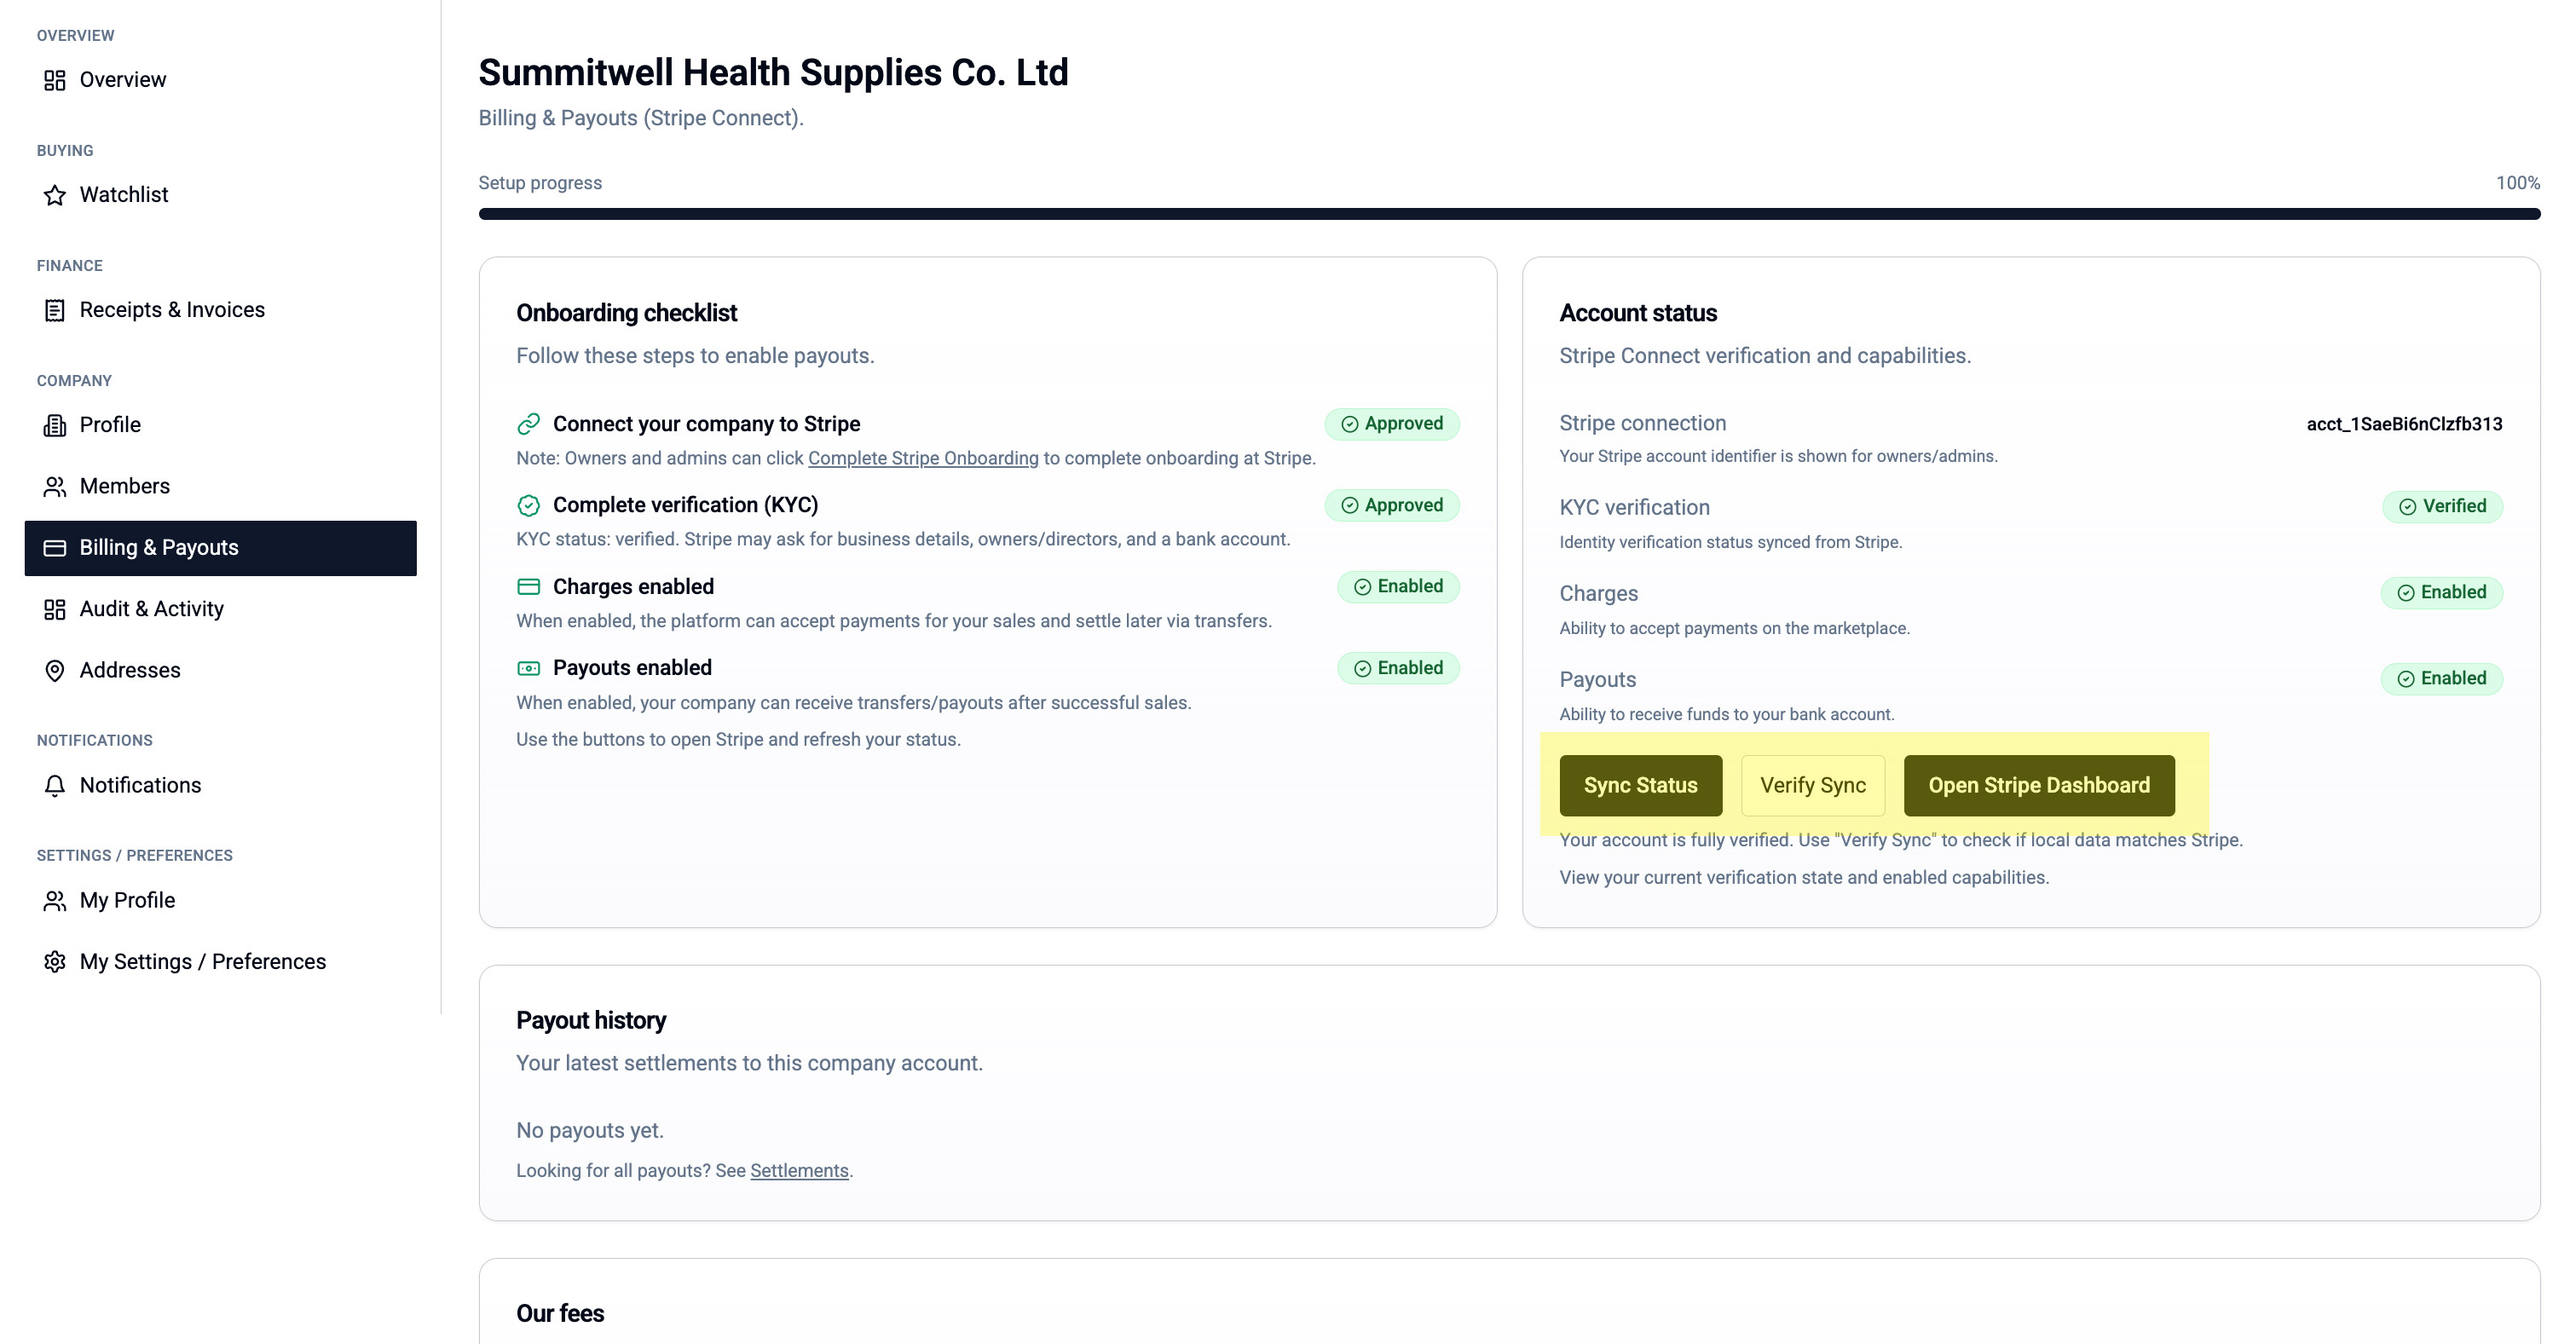
Troubleshooting: If items aren't green yet:
- Click "Sync Status" to refresh
- If still not updated, click "Verify Sync"
- Complete any remaining steps marked incomplete
- Contact support if issues persist
Step 5: Add a Delivery Address
- Go to Company > Addresses in the left menu
- Click "Add Address"
- Choose Type: Delivery
- Fill in the address details
- Click "Save"
To set as your default delivery address:
- Click "Change Default" under the Delivery column

Step 6: Add an Invoicing Address
- Still on Company > Addresses, click "Add Address" again
- Choose Type: Invoicing/Accounts
- Enter your billing address
- Click "Save"
Invoicing addresses are automatically set as default.
Step 7: Invite Team Members
- Go to Company > Members in the left menu
- Enter a team member's email address
- Choose their role from the dropdown:
- Seller - Can create and manage listings
- Buyer - Can bid on auctions
- Seller + Buyer - Full access to both
- Viewer - Can view but not transact
- Click "Send Invite"
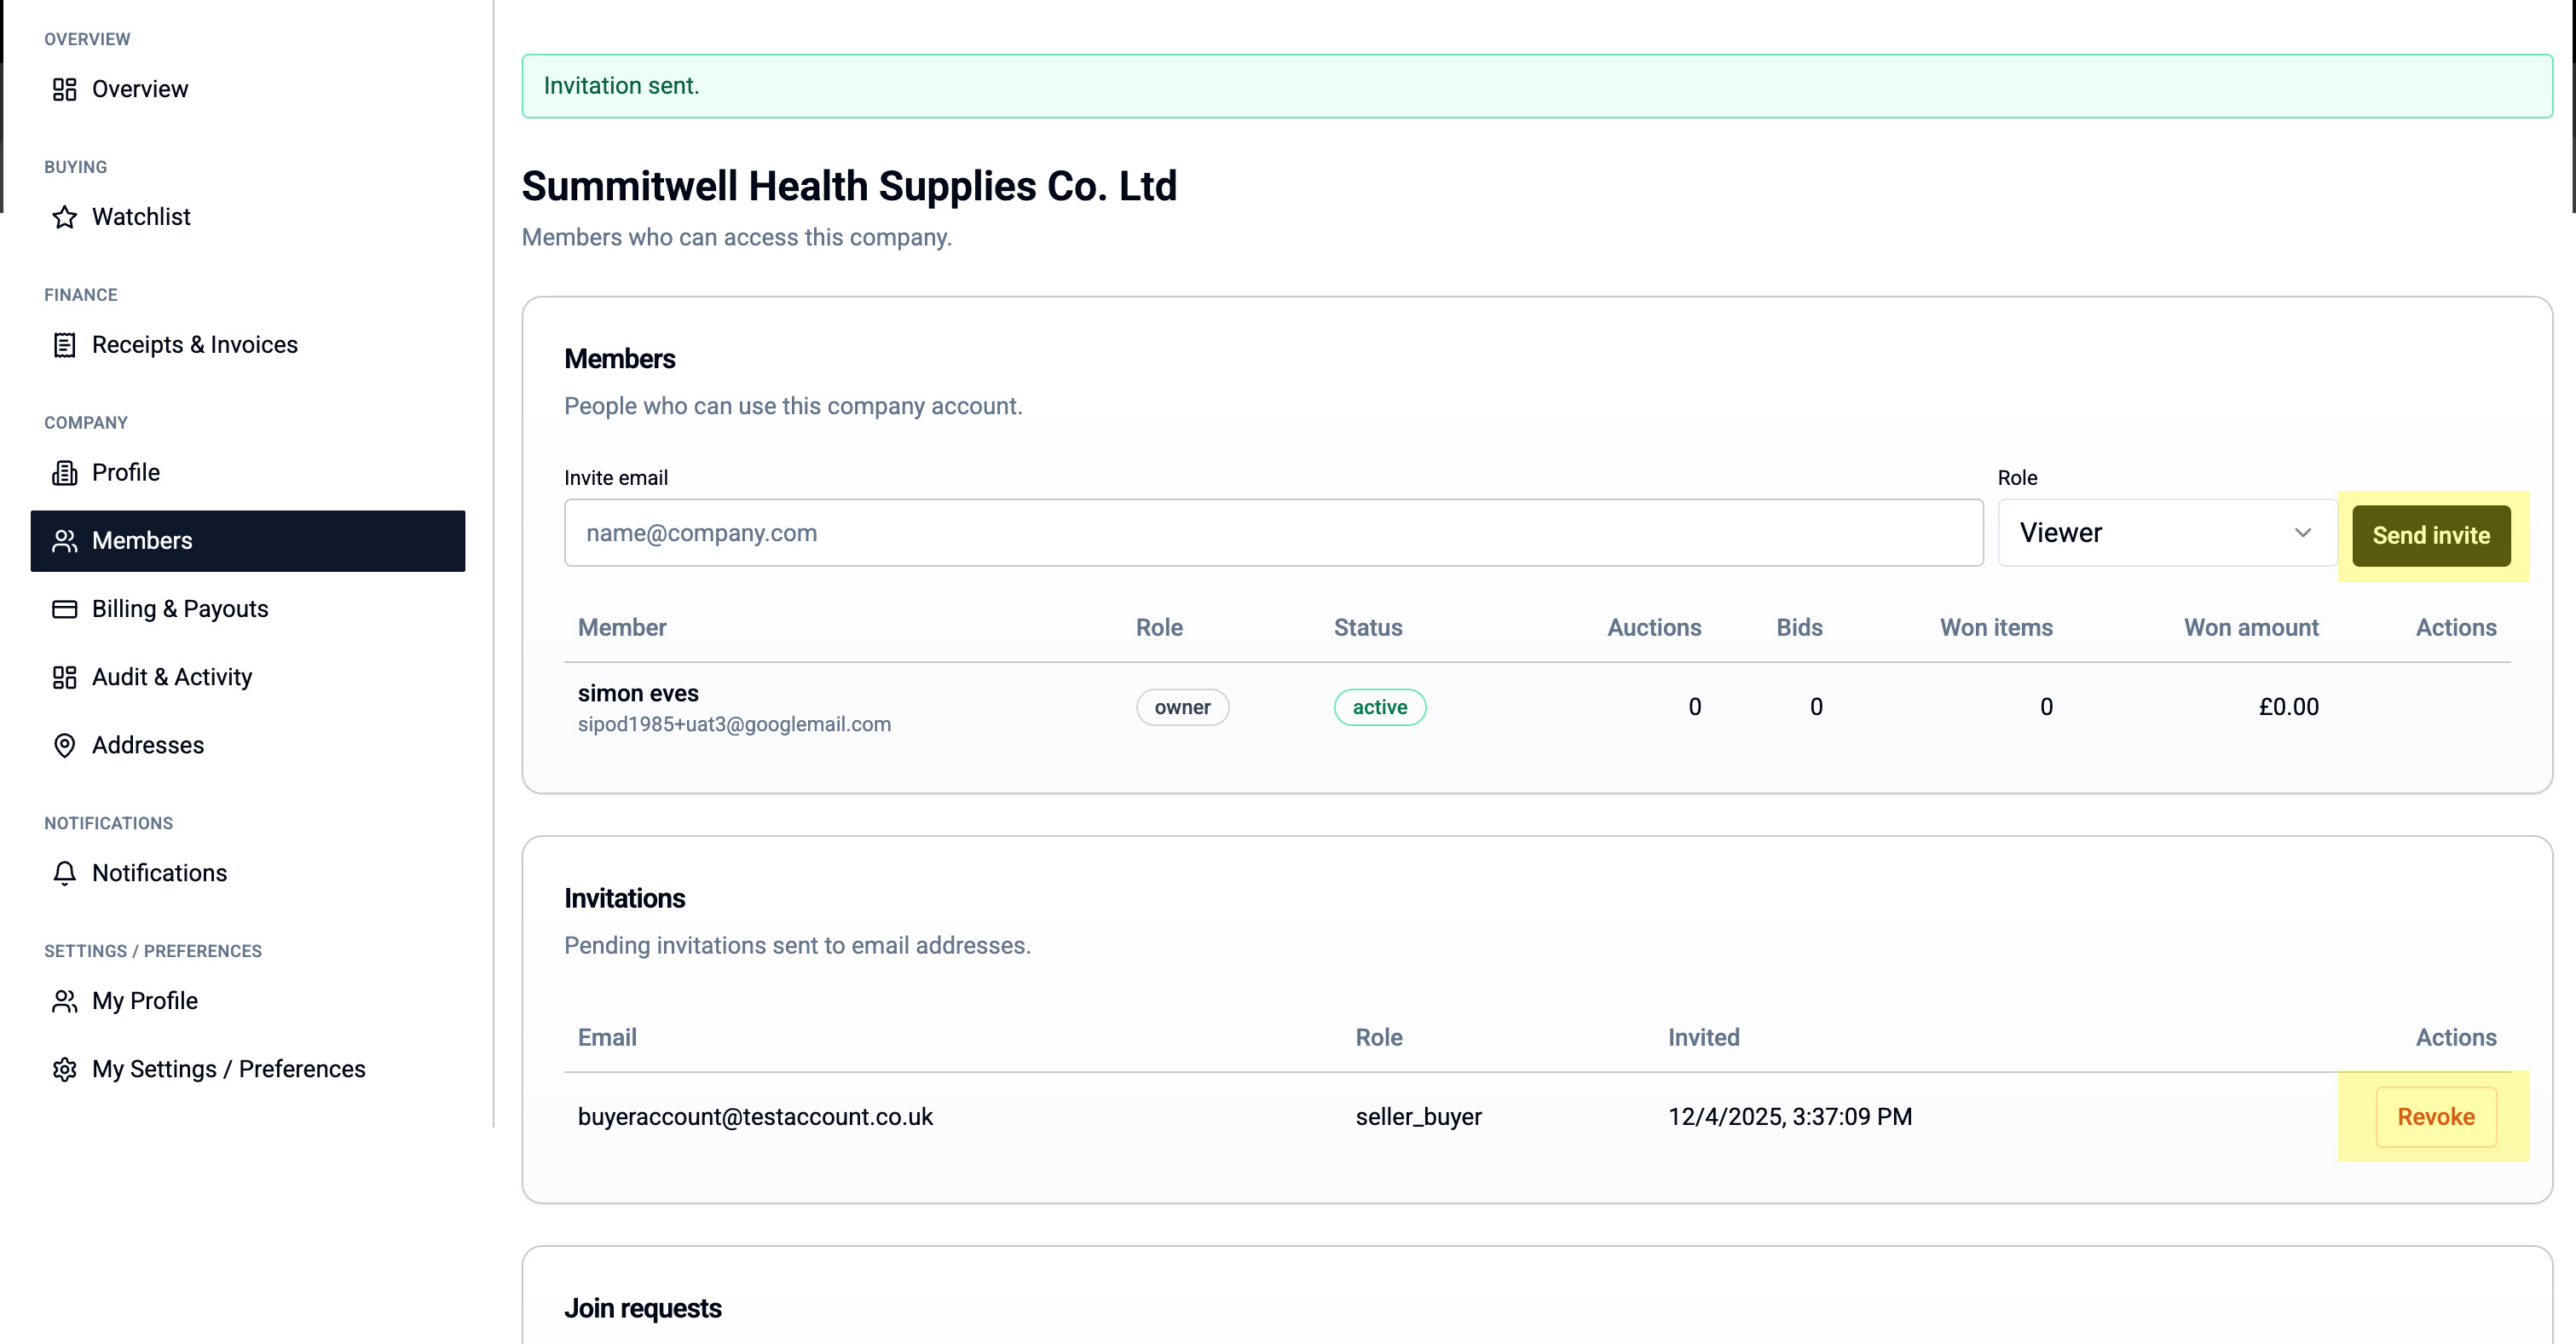
The invitation will appear in the "Invitations" list until accepted. You can click "Revoke" to cancel an invitation.
Next Steps Box: ✅ Setup Complete! Your company is now ready to buy and sell. Learn how to create your first auction or start browsing listings.